
Plants
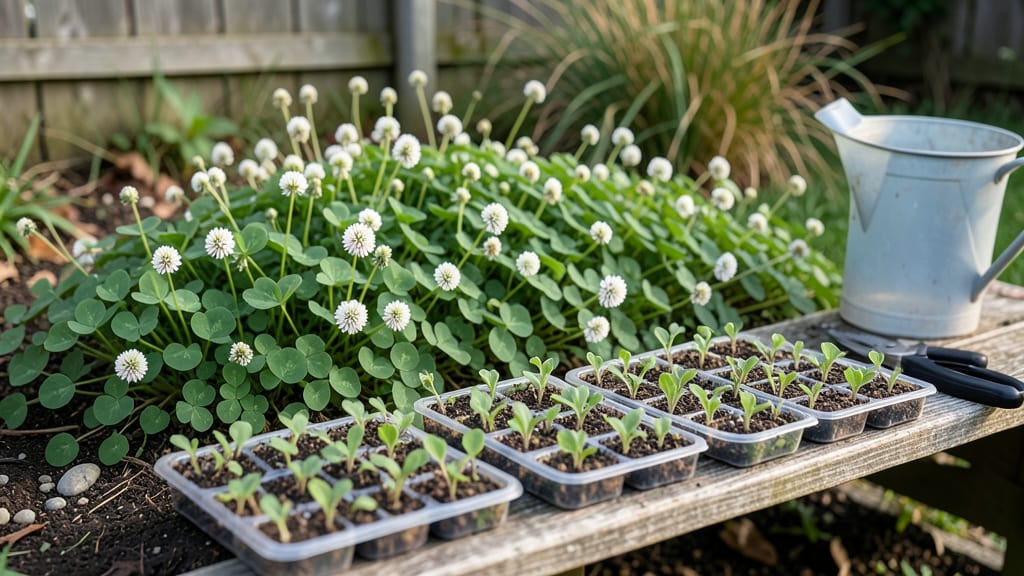
Planting clover in the fall gives it 6-8 weeks to establish strong roots before winter, which is the key to a thick, weed-resistant lawn the following spring.
Fall is the perfect time to plant clover—but timing is everything. Plant too early, and weeds take over; too late, and frost stunts growth. Here’s exactly when to sow for a lush, weed-resistant lawn next spring.
In USDA Zone 6a (like much of the Midwest), aim for late August to early September, when soil temperatures hover between 50-65°F. This window lets the seeds germinate before cool weather sets in, giving your clover a head start.
Below, I’ll walk you through how to calculate your local frost date, prep the soil for success, and avoid the three biggest mistakes that kill fall-planted clover—so you can enjoy a vibrant, low-maintenance lawn by next summer.
Optimal fall planting window for clover: 6-8 weeks before first frost
Timing your clover planting in fall is crucial for establishing a thick, weed-resistant ground cover before winter. The ideal window spans 6-8 weeks before your first frost, allowing roots to develop while avoiding early weed competition or late frost damage.
This timing works for white clover, red clover, and microclover varieties, though exact dates vary by USDA hardiness zone.
Clover seeds need soil temperatures between 50-65°F to germinate properly. Cooler soils slow growth, while warmer soils risk drought stress before winter. Most regions hit this sweet spot in late summer to early fall, but your local frost date determines the exact cutoff.
For example, in Zone 5, aim for mid-August to early September, while Zone 9 gardeners can plant until mid-October.
To find your precise planting window, check the NOAA frost probability maps or your local Cooperative Extension Service for the average first frost date. Subtract 6-8 weeks from this date to calculate your last planting day.
For instance, if frost hits November 15, your window closes around September 20. Pro tip: Use the 30-year average for reliability, not just last year’s weather.
If you’re unsure about your zone, use the USDA Plant Hardiness Zone Map to locate your area. For example, Zone 6 gardeners should plant between August 15 and September 1, while Zone 8 can extend sowing until September 20.
Remember, white clover germinates faster than red clover, so adjust your timing slightly if you’re planting mixed varieties.
Extending your planting window too late risks frost damage before roots establish. If temperatures drop below 40°F before germination (which takes 10-21 days), seeds may fail to sprout. To hedge your bets, plant 2 weeks earlier if your fall is typically wet or cool.
Conversely, in dry climates, prioritize the upper end of the window to avoid summer drought stress.
For cover crop purposes, aim for 6-8 weeks before frost to maximize root growth before winter. Clover’s nitrogen-fixing benefits peak when planted in this window, improving soil health for next year’s crops.
If you’re seeding a lawn, overlap with cool-season grasses like fescue for a lush transition. Always test your soil pH (ideal: 6.0-7.0) before planting, as clover struggles in acidic soils.
Pro tip: Use a seed starter mix if your soil is too cold. Mix compost into the top 2 inches of soil to raise temperatures slightly. For large areas, consider a broadcast spreader to ensure even coverage.
After planting, lightly rake seeds into the soil (no deeper than 1/4 inch) and water gently to settle them. Avoid heavy foot traffic for 2 weeks to prevent seed displacement.
Monitor your clover’s progress with weekly checks. Healthy seedlings should appear in 7-14 days under ideal conditions. If germination slows, thin competing weeds manually to reduce competition. By late fall, your clover should establish a dense mat of roots, ready to thrive when spring arrives.
This early start gives it a 3-4 month head start over spring-planted clover, resulting in a thicker, more resilient lawn.
Don’t stress if you miss the ideal window—early spring planting (March-April) is also effective, though fall-planted clover typically outperforms spring varieties. The key is consistent moisture and proper soil prep
How to prepare soil and plant clover for fall success
Preparing your soil for clover in the fall sets the stage for a thriving lawn or cover crop next spring. Clover thrives in well-draining soil with a slightly acidic to neutral pH (6.0-7.0), and proper prep ensures strong root development before winter.
Start by removing weeds and debris, then loosen the top 6 inches of soil to improve aeration and water absorption.
Test your soil's pH before planting—most garden centers offer affordable test kits. If your soil is too acidic (<6.0), add lime (1-2 pounds per 100 sq ft) 4-6 weeks before sowing.
For alkaline soil (>7.0), mix in sulfur or peat moss to lower the pH. Clover also benefits from organic matter, so work in 2-3 inches of compost or well-rotted manure.
- 1 Choose the Right Time: Plant 6-8 weeks before first frost (typically late August to early September in most U.S. zones). Use the NOAA frost calculator to pinpoint your local window.
- 2 Sow Seeds Shallowly: Scatter seeds 1/4 inch deep (no deeper!) with a seed spreader or by hand. Aim for 10-15 seeds per square foot for dense coverage. Lightly rake soil to cover seeds.
- 3 Water Thoroughly: Keep soil consistently moist (not soggy) for the first 2-3 weeks after planting. Water deeply in the morning to prevent fungal diseases. Aim for 1 inch of water per week.
- 4 Apply Mulch: Spread a thin layer of straw or grass clippings (1/4 inch) to retain moisture and suppress weeds. Avoid thick mulch, which can smother young seedlings. Replenish as needed.
- 5 Monitor Growth: Clover should sprout in 7-14 days at ideal soil temps (50-65°F). Thin seedlings to 2-3 inches apart once they reach 2 inches tall. Fertilize lightly with 5-10-10 in early spring if using for lawns.
After sowing, avoid walking on the soil to prevent seed displacement. Clover is cold-hardy but benefits from a light frost to harden off before winter. If your region experiences heavy snow, apply a thin layer of mulch (1 inch) in late fall to protect young roots.
By spring, your clover will be established and ready to outcompete weeds naturally.
For cover crop use, aim for a denser planting (15-20 seeds/sq ft) to maximize soil improvement. Mow or till clover into the soil in early spring to release nitrogen before planting warm-season crops.
If using for ornamental or lawn purposes, maintain a height of 2-3 inches with occasional mowing to encourage bushier growth.
Remember, clover’s success hinges on soil health and timing. With these steps, you’ll enjoy a low-maintenance, nitrogen-rich ground cover that thrives year after year. Happy planting! 🌱